The photo above is a Twiggy Mk1 from France

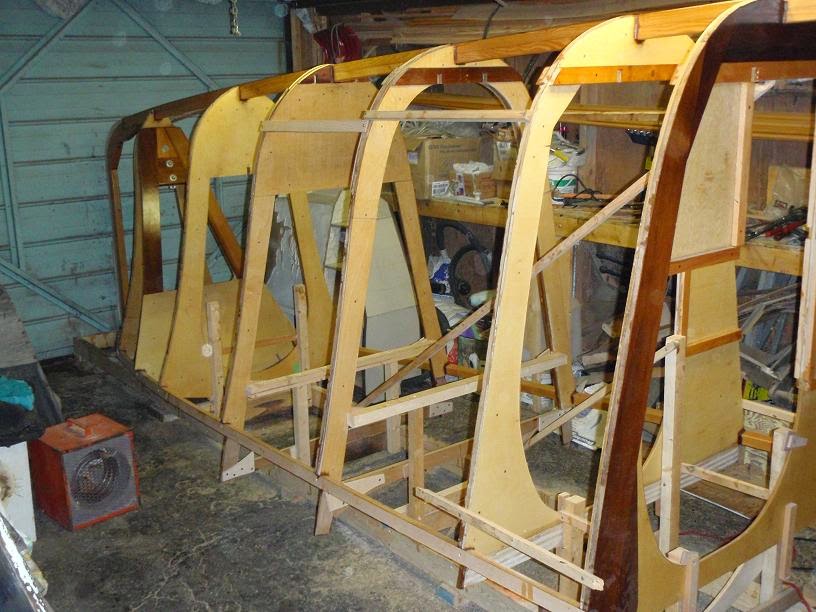
This presentation documents the construction of a modified version of Lock Crowther's famous Twiggy Mk 2 trimaran

Sunday, August 23, 2015

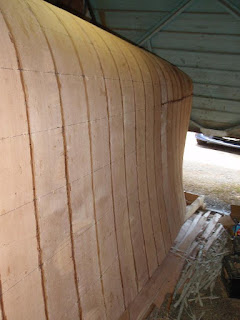
Hooray! - Mainhull 1st layer done!

1st layer of  1/8" cedar veneer done!
Nice shape.........  :-)


Wow, we finally have a hull !
As the Gougeon book cautions, progress is slow on the 1st layer.
Carefully fitting and gluing each veneer edge to edge, and cleaning the interior of the hull, takes time.
Averaged out to about 1 hour per veneer.
There were 55 veneers down each side, so:
110 hrs to complete the 1st layer.

Port side forward.

Starboard side looking aft.
Pencil lines show location of stringers for stapling the 2nd layer.

Port side looking aft.

Port side looking forward.

Starboard side looking forward.

Tightly curved bow veneers required extra pressure that staples would not hold.
3/8" plywood "buttons" held with screws worked well.
With wax paper to prevent adhesion of the buttons.

Keel area will need some fairing with the belt sander,
and epoxy filler in the gap.


Friday, July 31, 2015

Mainhull - 1st layer of 1/8" cedar veneers


 port side - 1st layer of veneers completed to frame 3

port side - 1st layer of veneers completed to frame 11

 starboard side - 1st layer veneers completed to frame 5

starboard side - 1st layer of veneers,
held in place by staples and strapping, 
and wedges with waxed paper to tame wild edges

Wednesday, March 11, 2015

Mainhull stringers done!

mainhull stringers looking forward

looking aft

mid section

bow area

Stringer install technique

masking tape located on the stringer at both sides of each joint indicates where 
to sand the epoxy coating on the stringer for better adhesion

- each sanded area on the stringer was first coated with clear epoxy

- and clear epoxy was applied in the notches to promote adhesion
- much of the wood in the notches is end grain
- they should be first saturated before filler is applied or a dry joint could result

then epoxy with wood filler (peanut butter consistency) was generously applied to each notch

- the stringer was inserted into the notches and held in place with temporary screws used as wedges
- the spatula was used to work any gaps in the notch full of epoxy filler
- fillets were made where the stringer meets the frame
- removing the masking tape made for easy cleanup near the fillet


Monday, February 23, 2015

stringer 6 installed with daggerboard case brace frame

stringer 6 installed


daggerboard case brace frame fitted to stringer 6

brace frame viewed from aft

Tuesday, February 17, 2015

cutting stringer notches

5/8" spade drill bit used to drill out bottom curve of notches,
carefully aligned with stringer direction,
usually not at right angles to frames 

saber saw used to make upper and lower cuts to complete notches,
usually not at right angles to frames so the saw has to be held freehand and steady

custom notch sander made from sandpaper wrapped over stringer stock,
each notch was sanded to the correct depth, 
and for a loose fit on the sides leaving room for epoxy filler

notches complete on the starboard side 

 a stringer was temporarily fitted dry to each row of notches,
to confirm that notch depths and overall fit was good

Tuesday, February 10, 2015

Main hull stringer layout - string lines


 using string lines to check the fairness of stringer alignment,
in preparation for notching
 first divided by tape measurement and pencil between the keel and waterline +3"
as per plan notation
 then put a small screw at each stringer/frame crossing pencil mark,
then ran a string line for each stringer between the screws
by eyeballing the string lines, small corrections needed to fair the alignment could be easily made,
and the symmetry of taper of several stringer alignments checked  simultaneously

Saturday, February 7, 2015

Sunday, February 1, 2015

Gunnel breasthook

 - reinforcing breasthook on gunnels at stem
- gunnels had to be cut down the middle and glued back together to accomodate heavy curvature near the bow

Saturday, January 31, 2015

Frame 2 install

 - frame 2 installed at 25 degrees from vertical to align with forestay
- lower tang shown will connect to and help support upper tang (to be installed later)
- the ss bar connector will be removeable to allow access forward
25 degree inclination

Saturday, January 24, 2015

custom keel bolts

- 3/8" ss keel thru bolts prevent splitting the case when the daggerboard hits bottom
- the daggerboard will break first (or that's the theory)
 it's much easier to start the thread die if you taper the bolt end first
here is one finished bolt, 3 more to go
custom 1/4" ss thru bolts at daggerboard case top corners

Saturday, January 10, 2015